Drupal 7 installation and setup tutorial for beginners

Drupal is a content management system which allows you to create and maintain many different types of websites without needing to know any coding language. Drupal is a free and open-source content management framework written in PHP. Strong security and user friendly interface make Drupal as a most popular web application framework.

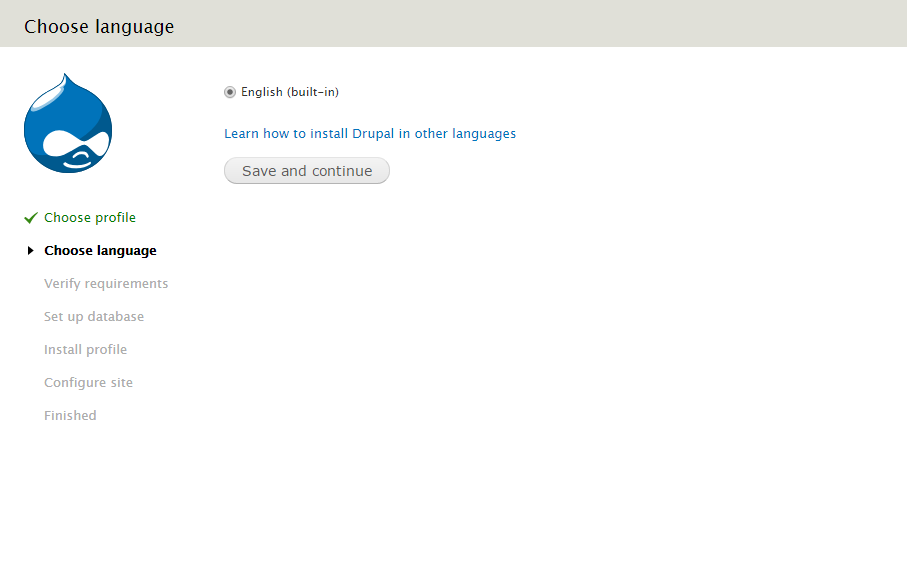
The following tutorial provides step by step instructions about Drupal project installation and Drupal website setup or configuration for the beginners. Also please keep in mind this tutorial is for Drupal 7.

Basic Configuration:

  • Download Drupal core latest version from here – https://www.drupal.org/download
  • Extract Drupal core package and rename the folder name to drupal/.
  • Move folder at the localhost or any server where you want.
  • Create database at PHPMyAdmin. For example the database name is drupal.
  • Drupal 7 come with a sample configuration file at sites/default/default.settings.php. Before you run the installation script, you need to copy the default.settings.php file and save the new file as settings.php in the same directory.
  • Change the permissions of settings.php to allow the install script to edit the file:
    chmoda+w sites/default/settings.php
    or
    chmod 666 sites/default/settings.php.
  • Change the permissions of the sites/default directory to allow the install script to create a files directory
    chmoda+w sites/default.
  • After the intallation script has run, you need to set the permission for settings.php, and the default directory again.
    chmod 644 sites/default/settings.php
    chmod 755 sites/default

Run the Installation Script:

  • To run the Drupal install script, point your browser to the base URL of your web site. If you installed Drupal on your desktop machine, the URL might be http://localhost/drupal.
  • Select an installation profile.
    select-an-installation-profile-screencapture
  • Choose language.
    choose-language-screencapture
  • If your installation directory is not yet configured properly, you’ll be informed on this page. If you configured step 5, step 6, step 7 described at the Basic Configuration section, you’ll be redirected to the database configuration step.
  • Database configuration – At this section choose database type and enter database name, database username, database password.
    database-configuration-screencapture

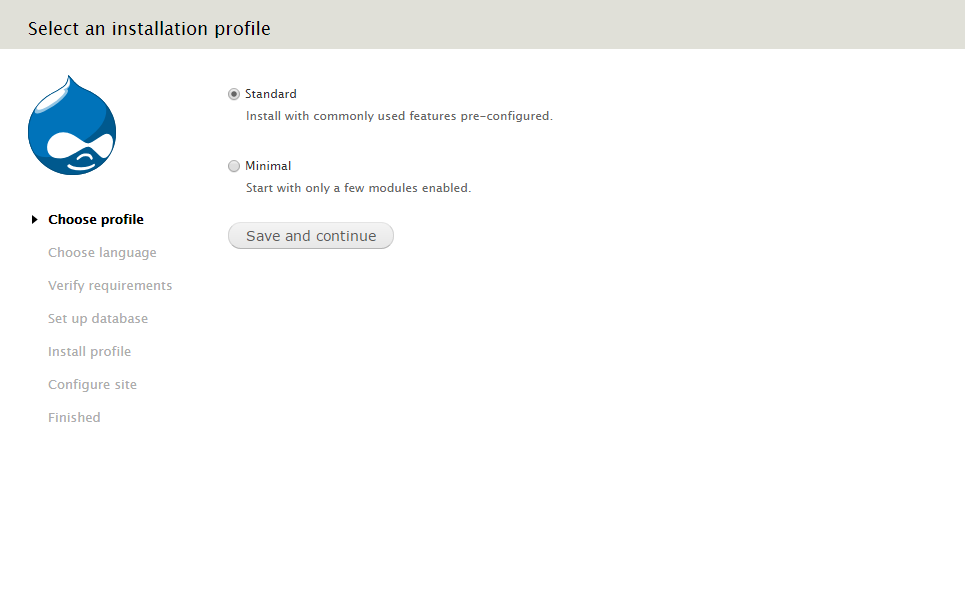
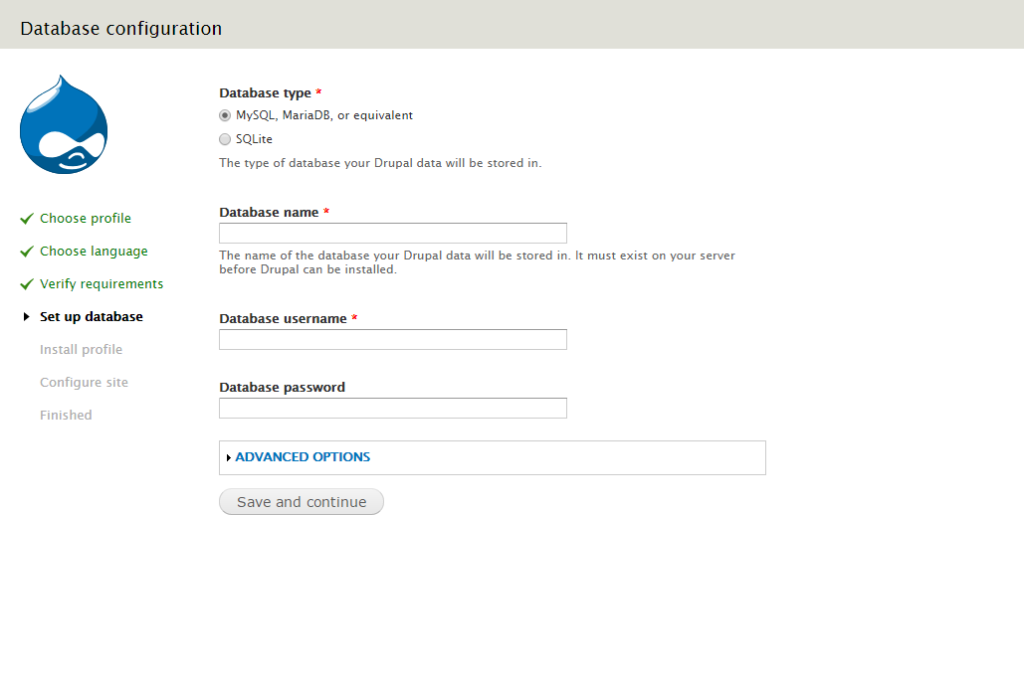
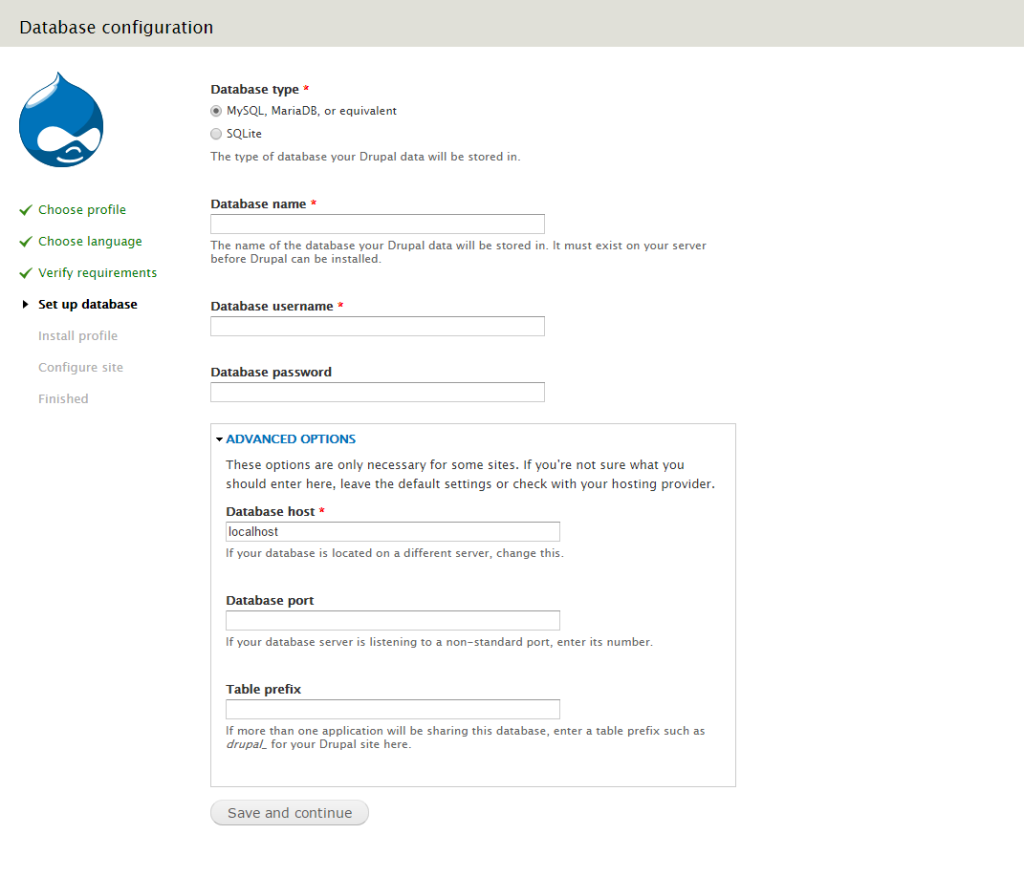
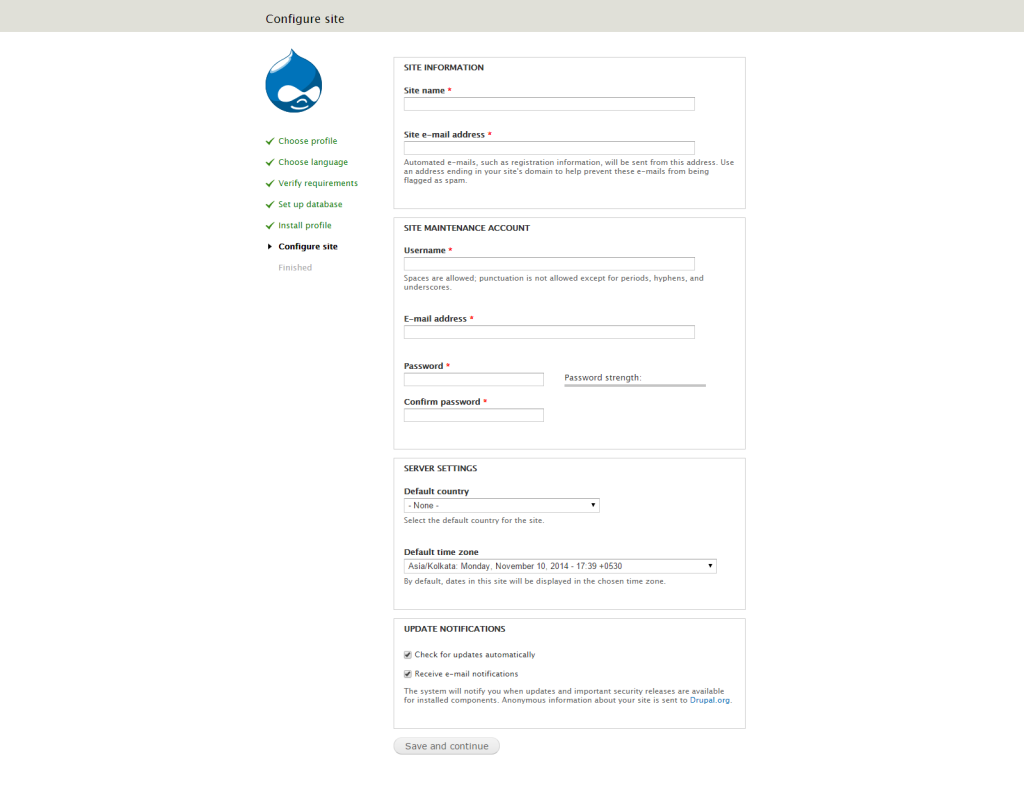
    If you want to change the database host or port or add table prefix, then you can configure from ADVANCED OPTIONS section.

    database-configuration-advanced-options-screencapture
  • Installing Drupal – Once the database configuration is finished, Drupal installation will be started automatically. Please wait for some times.
    installing-drupal-screencapture
  • Site Configuration – At this section you need to enter the site name, e-mail address and site maintenance account username, e-mail address, password, confirm password. Also you can set the additions options.
    site-configuration-screencapture
  • Drupal installation complete – Congratulations Drupal installation is completed. Now you can view the completion message and a link for visit the new site.
    drupal-installation-complete-screencapture
  • Once you click on the “Visit your new site” link, you would be redirected to the new site home page.
    new-site-home-page-screencapture
  • For access the administrative panel, point your browser to the base URL of your website with admin segment. If you installed Drupal on your desktop machine, the URL might be http://localhost/drupal/admin.
    drupal-administrative-panel-screencapture
  • If you are not able to access the administrative panel through 
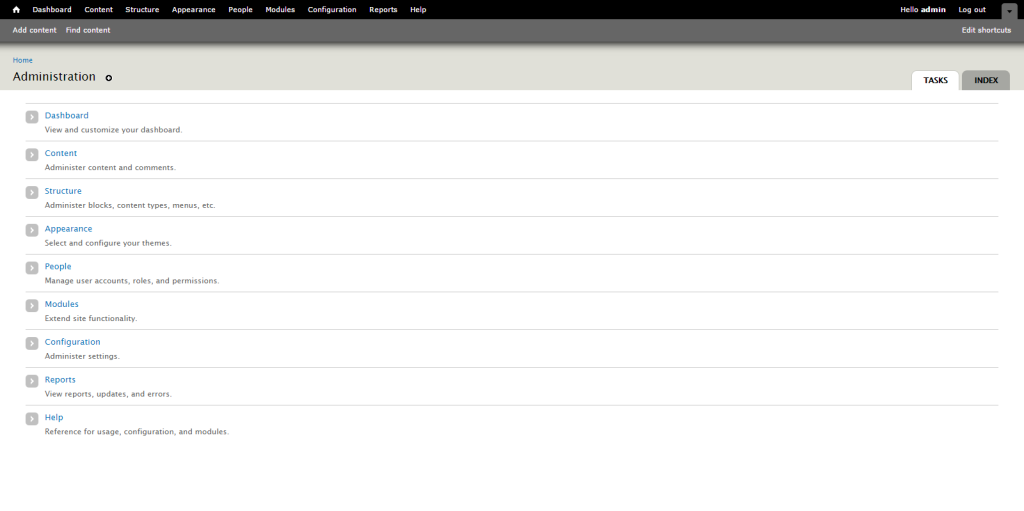
http://localhost/drupal/admin URL, you’ll access by http://localhost/drupal/?q=user URL.
  • You can use URLs like example.com/user instead of example.com/?q=user. Click on the “Configuration” link => click on the “Clean URLs” link from “SEARCH AND METADATA” section => check “Enable clean URLs” option => save configuration.

 On the above tutorial we have been described the basic configuration and installation guide of the Drupal 7. In our next post we will be described advanced label configuration in Drupal 7.

Do you want to get implementation help, or enhance the functionality of this script? Click here to Submit Service Request

Leave a reply

keyboard_double_arrow_up