close
The Multi-Language feature is necessary for the modern web application. This feature is used for the purpose of internationalization. In this tutorial, we will discuss how to implement the multi-language feature in CodeIgniter framework. Using CodeIgniter’s Language class, you can easily make your site multi-language. CodeIgniter’s Language class provides some functions to retrieve language files and lines of text.
The following guides will drive you to the right way for building a multi-language website with CodeIgniter. If you are new to CodeIgniter, you can read CodeIgniter Tutorial for Beginners first.
Open the application/config/config.php file and specify the site’s default language.
$config['language'] = 'english';
Create multiple language files and insert those files into the application/language/ directory with separate sub-directories for each language (for example, french, german, etc.).
The language files must be named with _lang suffix. For example, if you want to create a file containing site’s message translation then the file name might be message_lang.php.
Language files structure would look like following.
Within the language file (message_lang.php) you would need to assign each line of text to $lang array.
$lang['language_key'] = 'The actual message to be shown';
Sample language files are given below.
english/message_lang.php file would be look like the following.
<?php
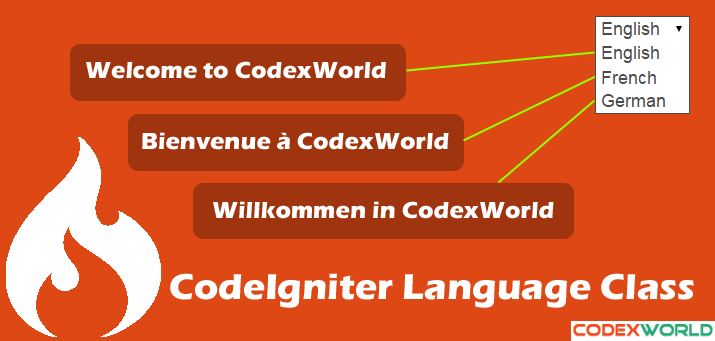
$lang['welcome_message'] = 'Welcome to CodexWorld';
french/message_lang.php file would be look like the following.
<?php
$lang['welcome_message'] = 'Bienvenue à CodexWorld';
german/message_lang.php file would be look like the following.
<?php
$lang['welcome_message'] = 'Willkommen in CodexWorld';
In order to fetch a line from a particular language file, you need to load the language file first. There are two options for loading a language file.
In Controller:
Into the controller’s __construct() function write the following code.
$this->lang->load('message','english');
If you choose this option, you need to load language file in all controller of your application.
Using Hooks:
For using the hooks option you need to enable the hooks feature in application/config/config.php file.
$config['enable_hooks'] = TRUE;
Open application/config/hooks.php file and define a hook.
$hook['post_controller_constructor'] = array(
    'class'    => 'LanguageLoader',
    'function' => 'initialize',
    'filename' => 'LanguageLoader.php',
    'filepath' => 'hooks'
);
Create LanguageLoader class in LanguageLoader.php file inside the application/hooks/ directory. LanguageLoader.php file contain the following code.
<?php
class LanguageLoader
{
    function initialize() {
        $ci =& get_instance();
        $ci->load->helper('language');
        $ci->lang->load('message','english');
    }
}
After loading the language file you can fetch the line text using the following code.
$this->lang->line('welcome_message');
Now it’s time to switch different languages and make your site multilingual. We will use the session to store user’s requested language and load the respective language.
Before starting to implement multilingual features, open the application/config/autoload.php file and load SESSION library and URL helper.
$autoload['libraries'] = array('session');
$autoload['helper'] = array('url');
We will create LanguageSwitcher controller for handing the language switch. application/controllers/LanguageSwitcher.php file contain the following code.
<?php if ( ! defined('BASEPATH')) exit('No direct script access allowed');
class LanguageSwitcher extends CI_Controller
{
    public function __construct() {
        parent::__construct();
    }

    function switchLang($language = "") {

        $language = ($language != "") ? $language : "english";
        $this->session->set_userdata('site_lang', $language);

        redirect($_SERVER['HTTP_REFERER']);

    }
}
Open the application/hooks/LanguageLoader.php file and replace file’s code with the following code.
<?php
class LanguageLoader
{
    function initialize() {
        $ci =& get_instance();
        $ci->load->helper('language');
        $siteLang = $ci->session->userdata('site_lang');
        if ($siteLang) {
            $ci->lang->load('message',$siteLang);
        } else {
            $ci->lang->load('message','english');
        }
    }
}
Display the languages dropdown into view. Once the language option is changed, the switchLang() function of LanguageSwitcher controller would be called. switchLang() function set the site language into session based on the requested language and redirected to the view page. The sample languages dropdown and multi-language welcome message code is given below.
<select onchange="javascript:window.location.href='<?php echo base_url(); ?>LanguageSwitcher/switchLang/'+this.value;">
    <option value="english" <?php if($this->session->userdata('site_lang') == 'english') echo 'selected="selected"'; ?>>English</option>
    <option value="french" <?php if($this->session->userdata('site_lang') == 'french') echo 'selected="selected"'; ?>>French</option>
    <option value="german" <?php if($this->session->userdata('site_lang') == 'german') echo 'selected="selected"'; ?>>German</option>
</select>
<p><?php echo $this->lang->line('welcome_message'); ?></p>
Also, you can notice that we are used the language switcher URL without index.php. So, you should need to create a .htaccess file in root directory and this file will contain the following code.
RewriteEngine on
RewriteCond $1 !^(index\.php)
RewriteRule ^(.*)$ /codeigniter/index.php/$1 [L]
Looking for expert assistance to implement or extend this script’s functionality? Submit a Service Request
💰 Budget-friendly • 🌍 Global clients • 🚀 Production-ready solutions


great work bro …God bless You…
Its really perfect but i have a problem when the menu and some page content is in db controlled. If there are some who have a solution to it, I am grateful for it.
Thanks alot.
Just follow the steps and u get the results.
Very Nice Tutorial Thanks so much for this brilliant job
how i can keep lang name in url like this localhost/en/bla in english and same in other language like french localhost/fr/bla
how i can keep lang name in url like this localhost/en/bla in english and same in other language like french localhost/fr/bla
very nice. I like this
Very useful these stuff. Keep it up
hello sir, how can i load 1 language multiple file like ‘message’. in this example ‘message’ filename given static in LanguageLoader class… i have to use multiple files… how it can be possible
Very usefull this article. I have a question, if I have a Javascript validation plugin in my codeigniter project, with several error messages, how do I get them from lang Array, considering that I canot access PHP vars ?
Thank you, Cate
Hello sir
this article is very useful its work perfect ,
but i have a problem , when i want to use this functionality for mobile app rest api its not work .
Very useful and easy article
Hi,
I need to create a Multilingual and Multi-currency website for multiple domain like domain.eu, domain.in, domain.br. For that need to store each language data in database ? Can you give me some idea, Ho i can implement this in codeigniter ?
Thanks, It worked very simple and great help.
Thanks a lot
Very useful article. Now i want to change language of data fetched from database as per language selection by user.
Thanks in advanced.
thanks, It worked very easily.
Great Tutorial…
Work and simple ways 😀
great tuts, thanks
I like this very simple like above and clear to understand. Thanx.